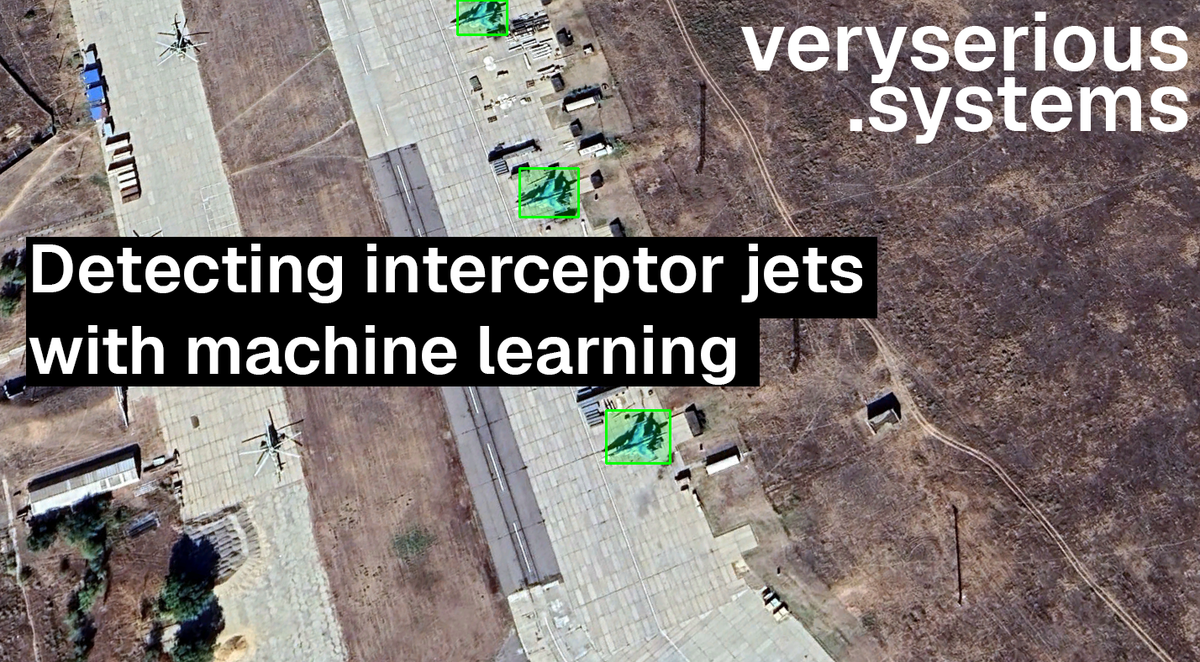
Detecting interceptor jets with machine learning.
Detecting interceptor jets using OSINT and machine-learning.
I like software, computing and OSINT. This post is going to be combination of all 3 of these things. I'll be describing the data gathering, annotation, training and usage for creating a YOLO based model for detecting interceptor jets.
Gathering the data.
The OSINT community is amazing, and puts a lot of effort into maintaing up-to-date and accurate sources. My interest for this project was to use Russian military air bases to train a model to recognise interceptor jets from publically available satellite imagery.
There are many lists that exist of these air bases, a non exhaustive but thorough list can be found here. After getting a list of names I attempted to get some satellite imagery. The Copernicus browser from the EU is fantastic, and allows access to SENTINEL imagery, however at 10meters/pixel the resolution was nowhere near good enough to see small objects such as planes. Google Earth to the rescue.
If you want to follow along, here is a KML export that you can import into Google Earth Web, Google Earth Pro (on desktop) or hopefully any other mapping software that you use.
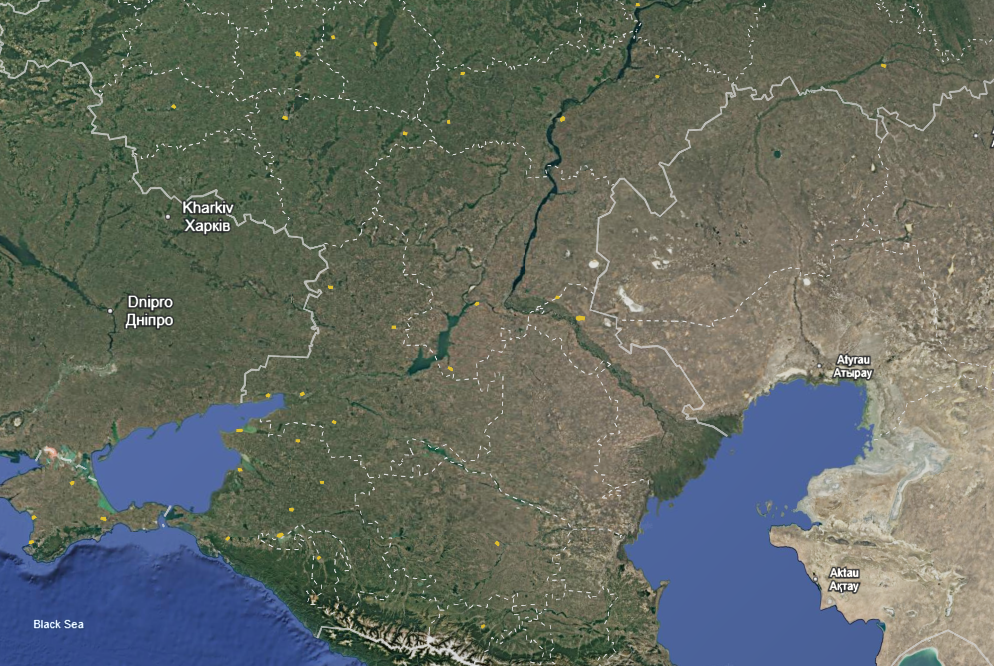
This will give you a map of outlines of bases, based on the list provided above. Apologies in advance for any errors, mislabeling or omissions.
Even just clicking around we can start seeing some interesting things.
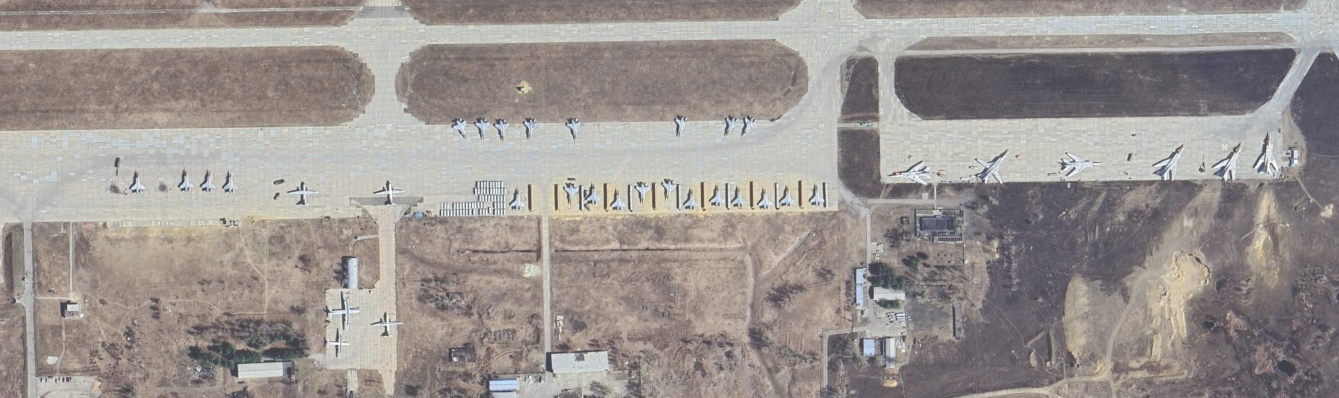
The following process was fairly painstaking and manual but I went through each area I had plotted and took hundreds of screenshots of planes, jets, drones and helicopters.
Annotating the data
I used Label Studio, other data annotation solutions are available and some may even be much better, however this one is free, easy to use, and easy to install. Do what you like, here's how I did it.
$> pip install label-studio
$> label-studio start
I created a new project and selected "Object Detection with Bounding Boxes".
I then imported all of my screenshots, at this point this project was still a proof of concept, so I started with ~300 satellite image screenshots. The following process was fairly time consuming, but it involves using label-studio to go through each imported image and manually draw bounding boxes around the objects I was interested in detecting.
It looks like this.
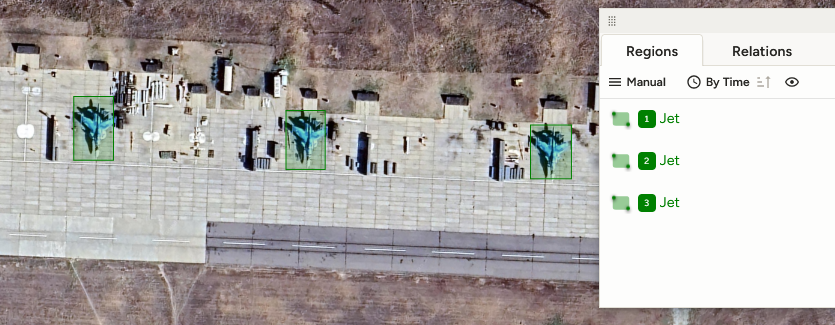
I only defined 1 object to label initially, although this is the point at which you would add the objects that you want to detect. The quality of the bounding is going to be the limiting factor of how good the final model is.
Once I was done, I exported my data in the "YOLO with Images" format. Now we can start writing some code and training.
Training the model
I initially tried training this model on my personal desktop, which has 32GB of RAM and an RTX 2060, sadly that just wouldn't do. If you have better hardware available, you should adapt the following process to make the most of it.
We will be starting with the Yolo11x pre-trained model. If you have good hardware, at this point in time you're going to want to setup a Python venv. If you don't, it's time to head over to Google Colab.
$> pip install ultralytics
OR
$> uv pip install ultralytics
The free tier of Google Colab, will grant you some free access to an Nvidia T4, and a bunch of RAM & CPU, which is just right for us to train our y0lo11x with our newly annotated data . Availability is not guaranteed, and your mileage may vary.
# train.py
from ultralytics import YOLO
import torch
import gc

if __name__ == '__main__':
    gc.collect()
    torch.cuda.empty_cache()
    model = YOLO('yolo11x.pt')

    results = model.train(
        data='data.yaml',
        epochs=50,
        imgsz=1280,
        batch=2,
        device='cuda'
    )

    print("Done")
That's the training script. Inside the same directory there is a folder named images and labels and a file named data.yaml which looks like this.
# data.yaml
train: ./images
val: ./images
nc: 1  # Singular Object Class
names: ['Jet']
If you're wondering why the labels folder isn't in this files, it's because Ultralytics will automatically find the labels the folder.
At this point you're ready to click play on your Colab Notebook.

After ~2 hours for me, I had a trained model ready to use.
I used the 2 hours it took to train to gather even more satellite imagery, which means we have some new images to test our model on. So let's do that.
Testing & Usage
At this point you want to download the best.pt file from the latest runs/detect/trainXXX/weights/ folder, this is relevant if you tried to run the code multiple times.
You will also be able to actually use the model on almost any device so you can leave Colab and head to a local workspace.
from ultralytics import YOLO
import cv2
import os
def process_images(input_folder, output_folder, model_path='best.pt'):
os.makedirs(output_folder, exist_ok=True)
model = YOLO(model_path)
png_files = [f for f in os.listdir(input_folder) if f.lower().endswith('.png')]
# Process each PNG file
for filename in png_files:
input_path = os.path.join(input_folder, filename)
output_filename = filename.replace('.png', '.detected.png')
output_path = os.path.join(output_folder, output_filename)
print(f"Processing: {filename}")
try:
results = model(input_path)
img = cv2.imread(input_path)
for box in results[0].boxes:
x1, y1, x2, y2 = map(int, box.xyxy[0])
overlay = img.copy()
cv2.rectangle(overlay, (x1, y1), (x2, y2), (0, 255, 0), -1)
alpha = 0.2
cv2.addWeighted(overlay, alpha, img, 1 - alpha, 0, img)
cv2.rectangle(img, (x1, y1), (x2, y2), (0, 255, 0), 2)
cv2.imwrite(output_path, img)
print(f"Saved: {output_filename}")
except Exception as e:
print(f"Error processing {filename}: {str(e)}")
if __name__ == '__main__':
input_folder = "clear_images/"
output_folder = "detected_images/"
process_images(input_folder, output_folder)
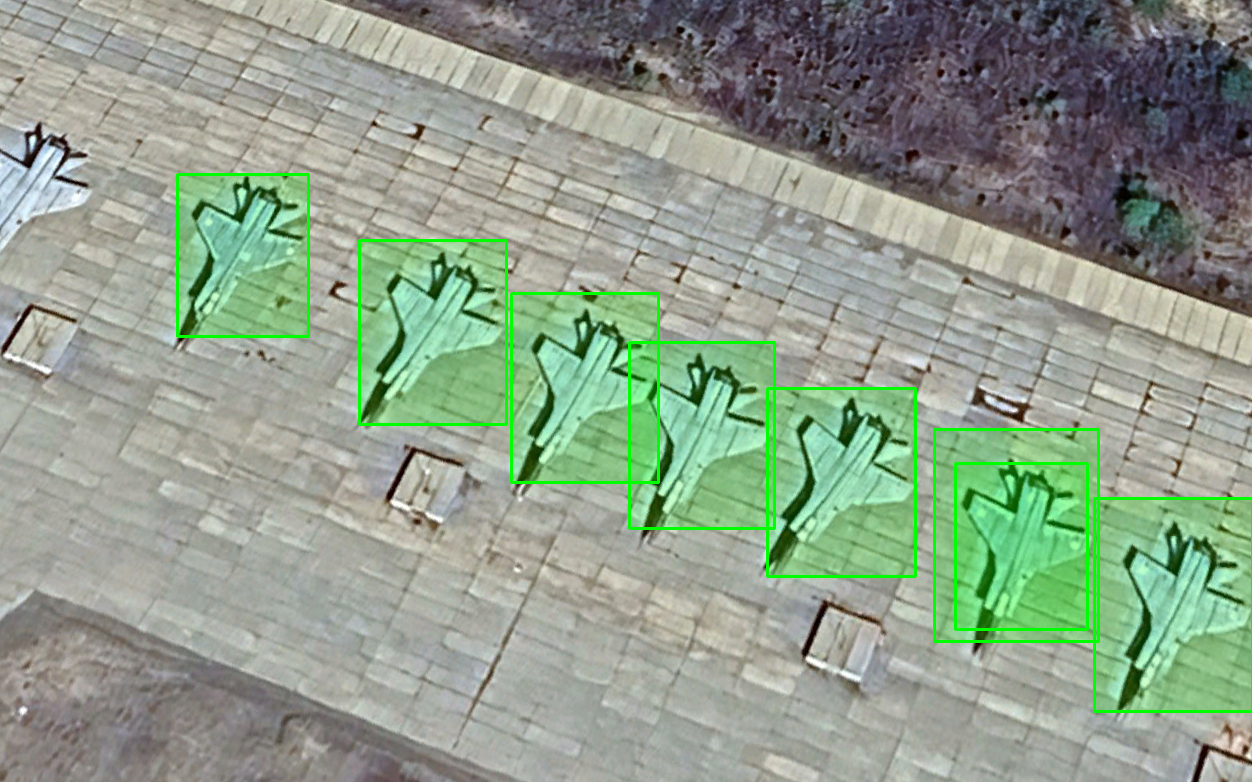
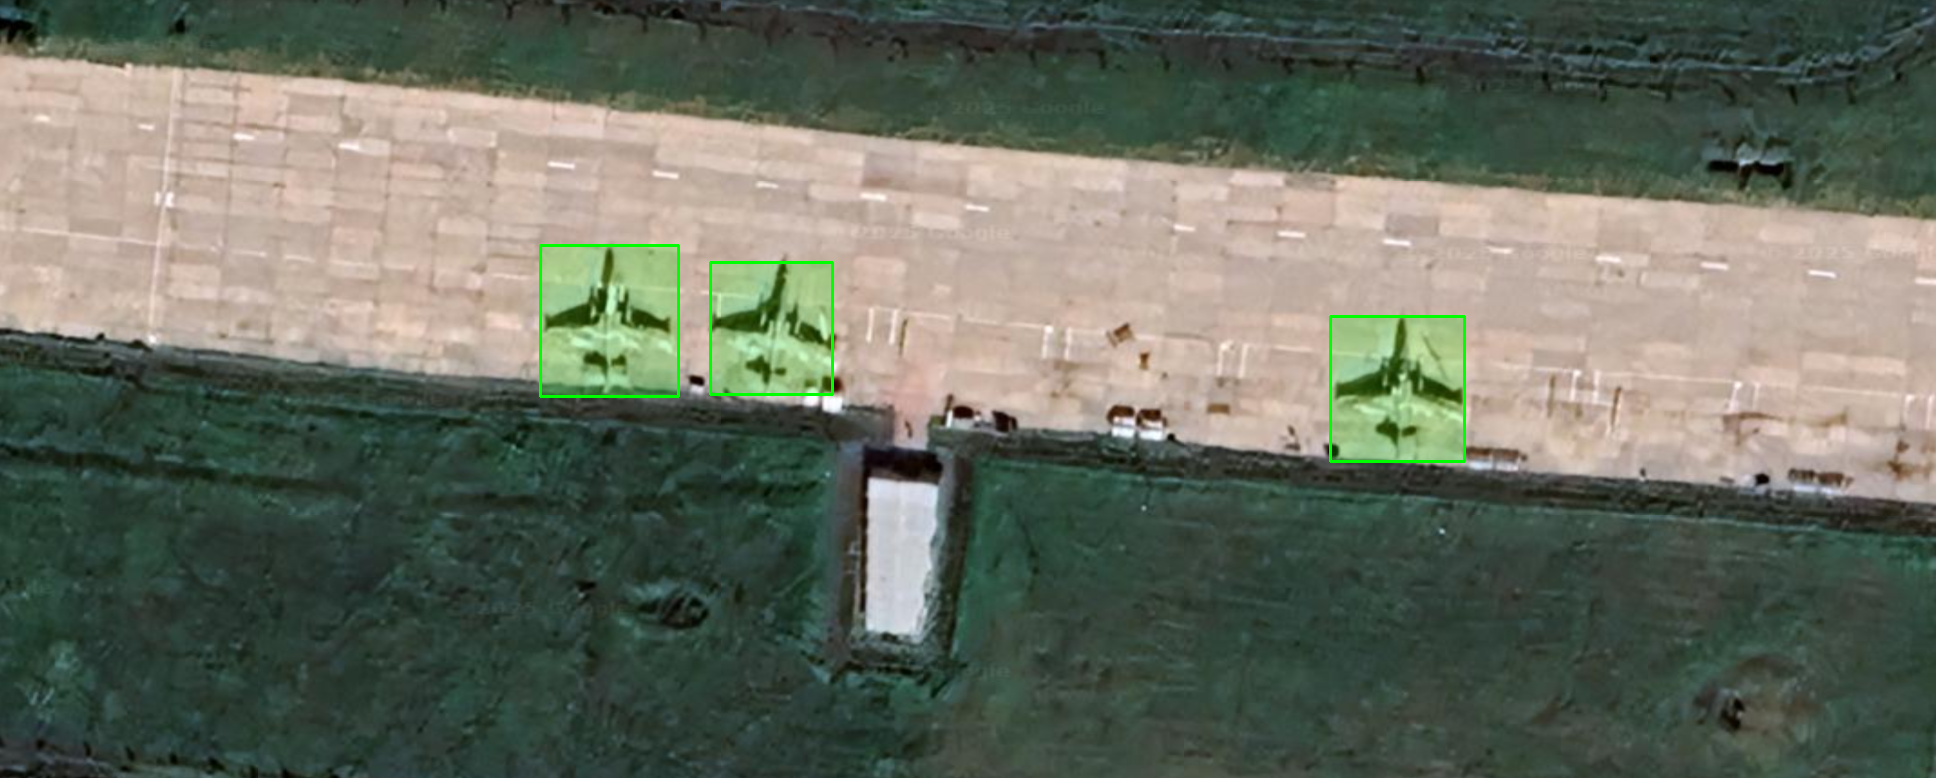
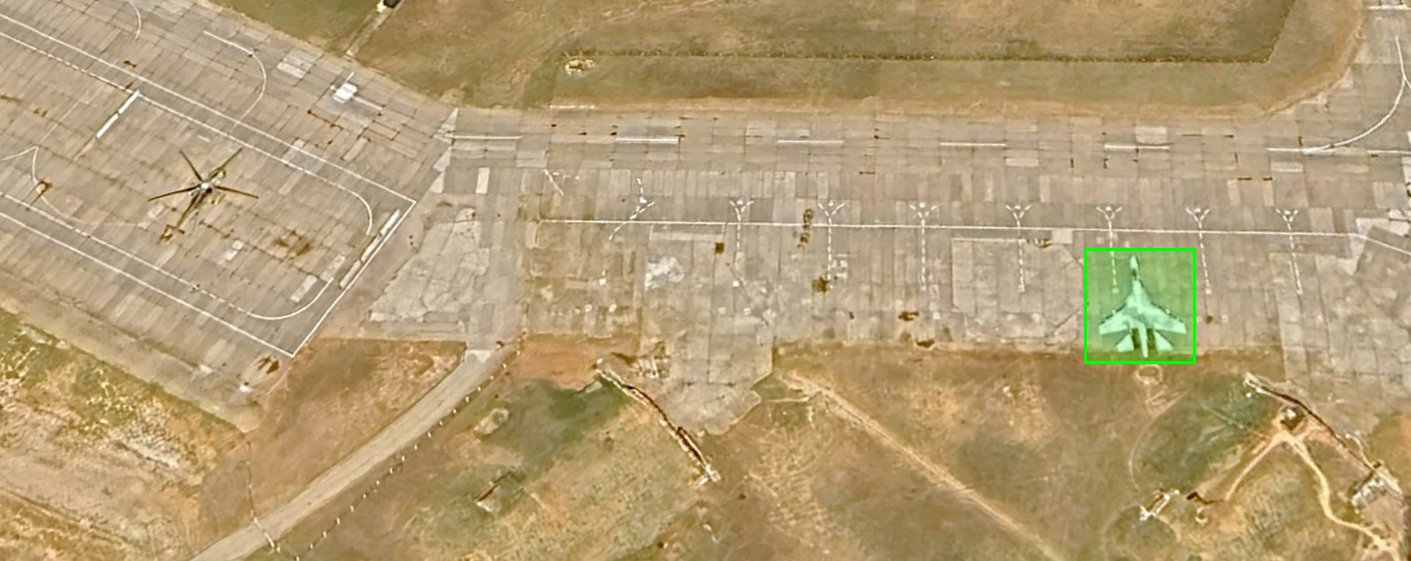
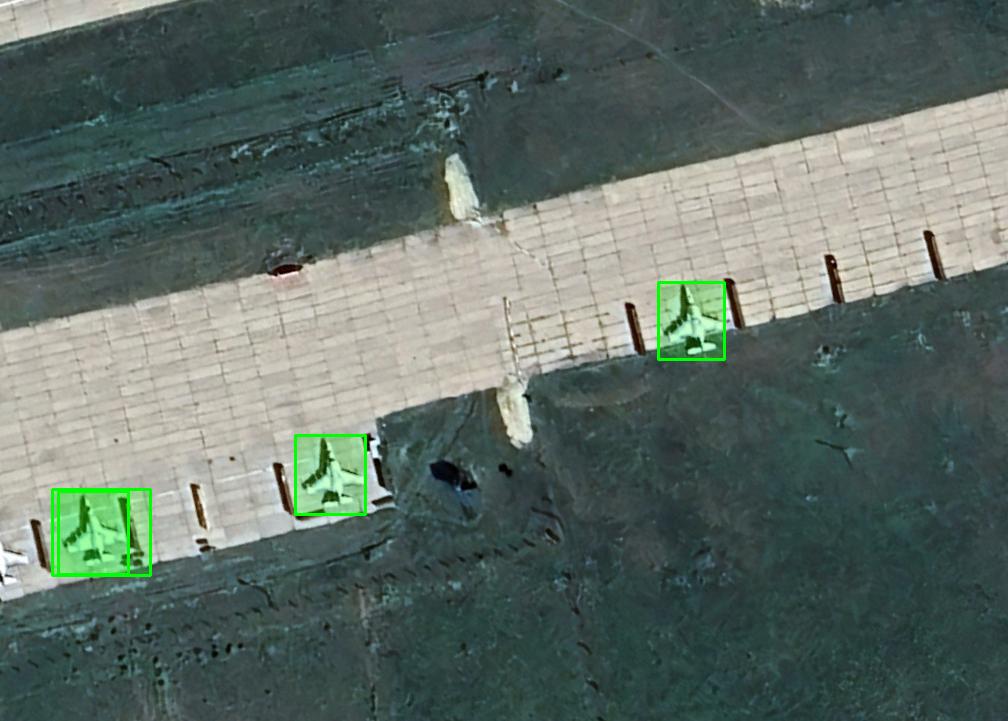
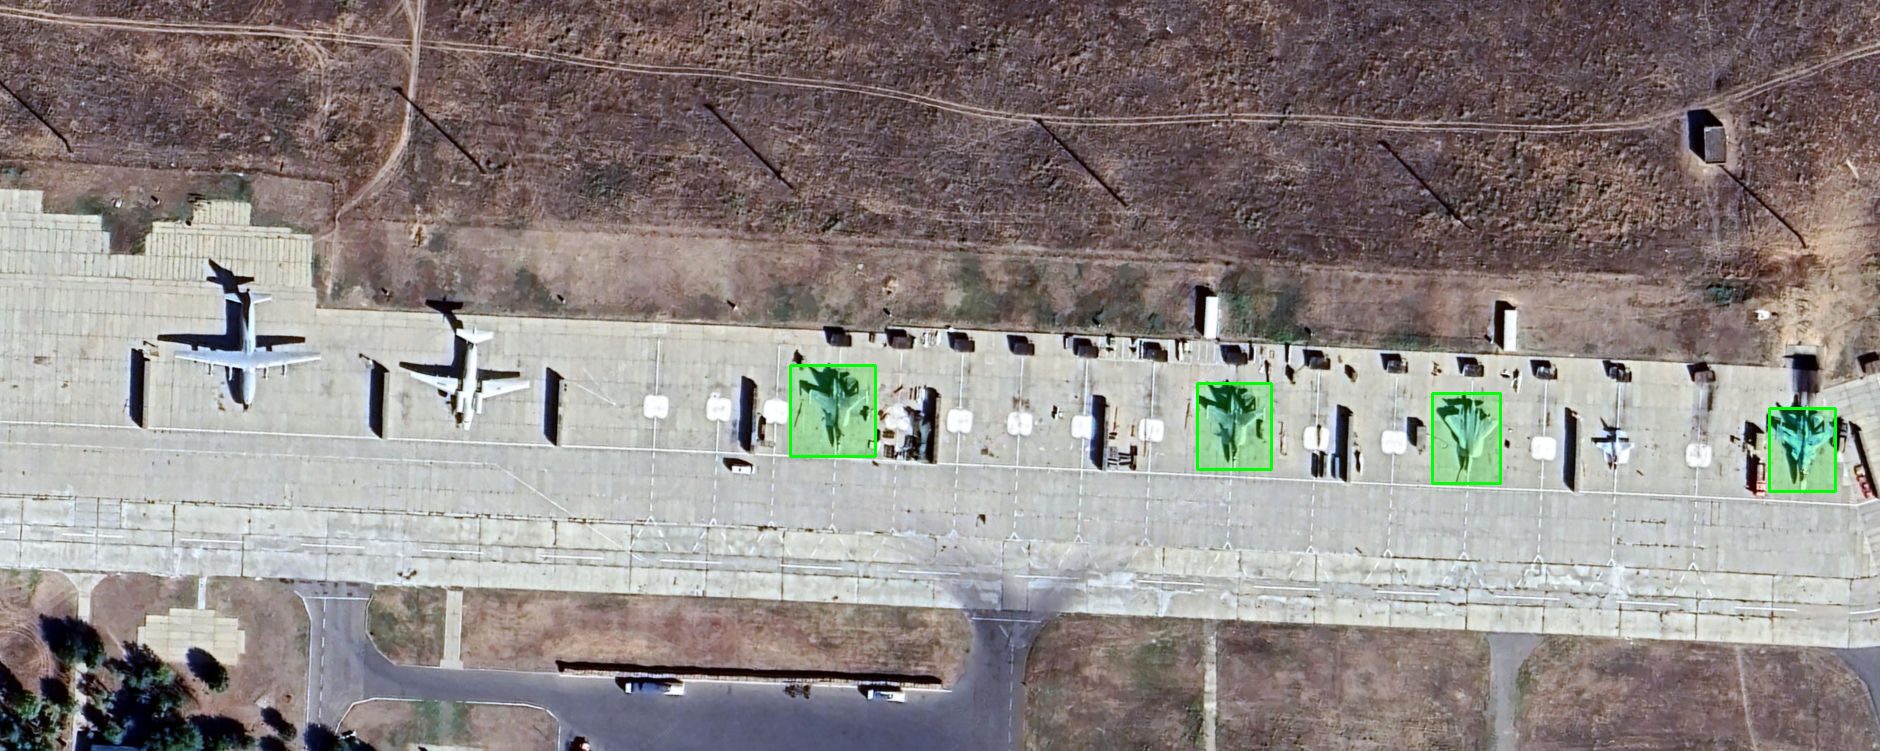
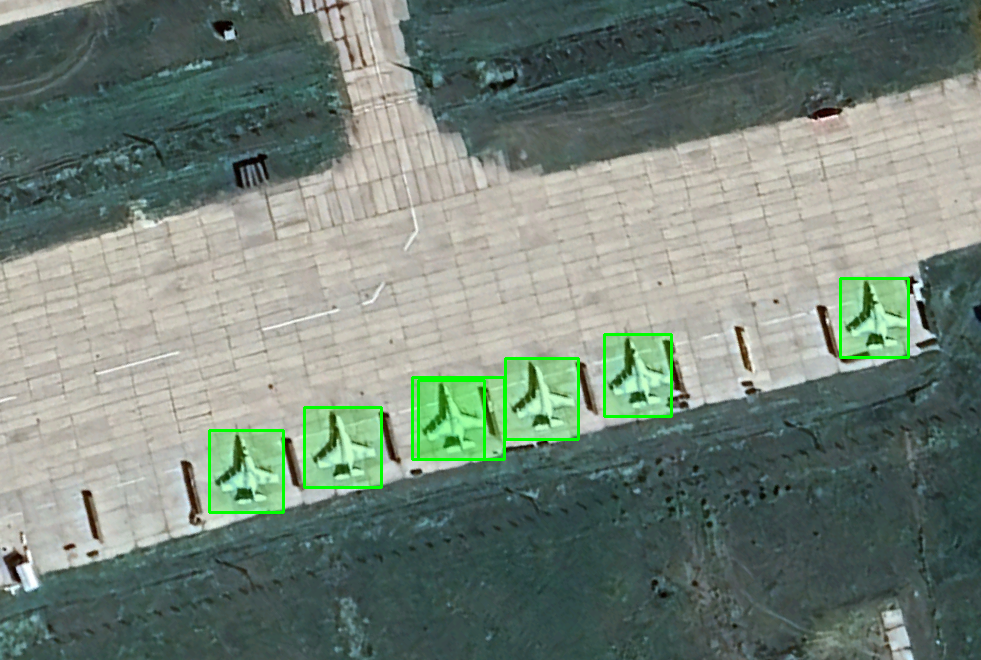
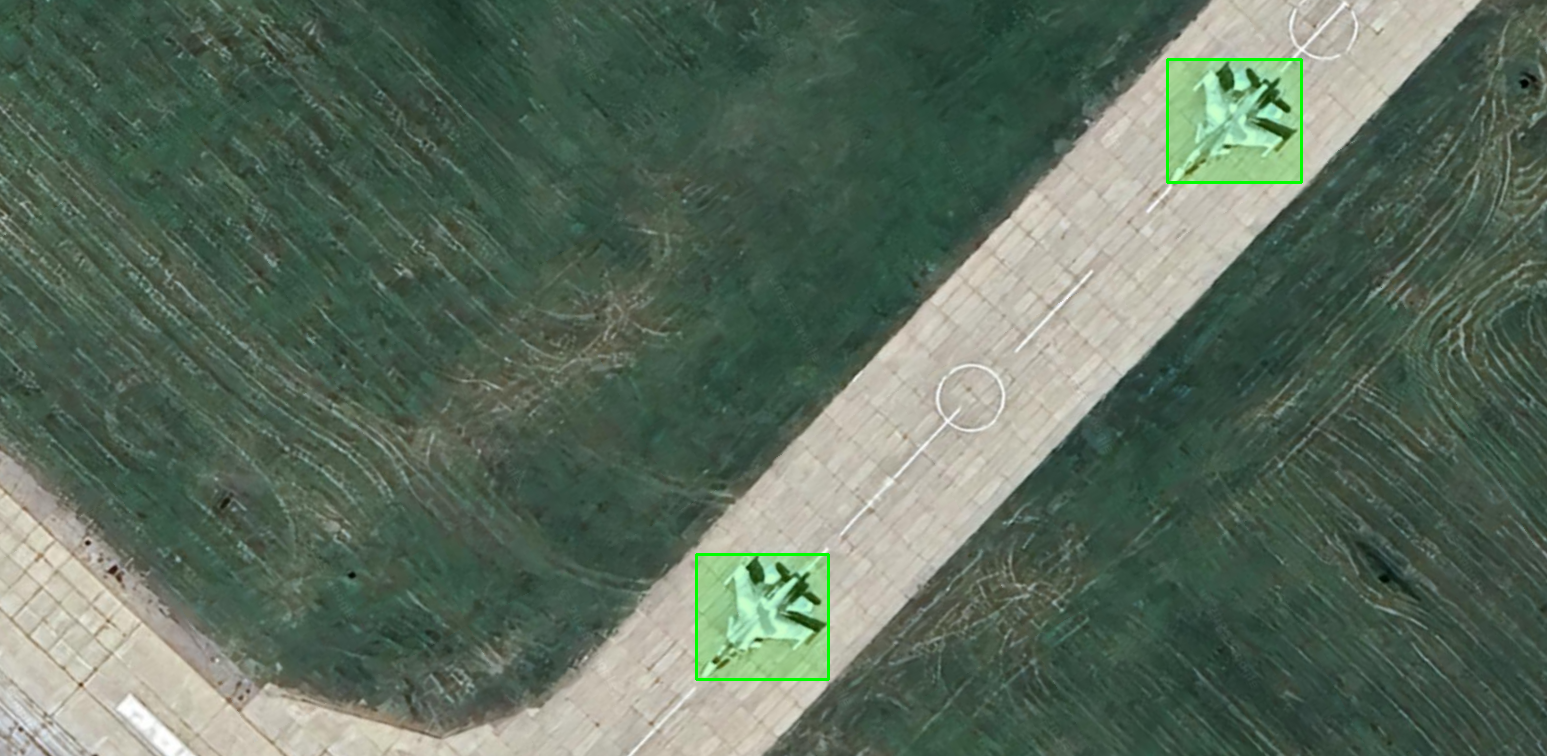
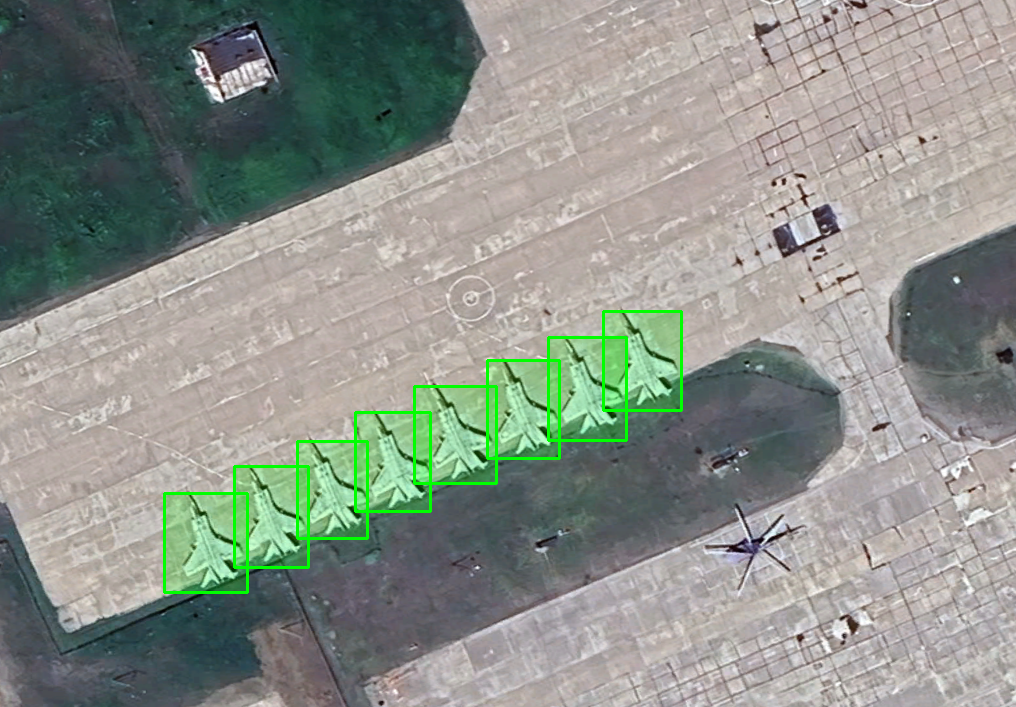
print("Processing complete!")This script will run any photos you place in a folder named clear_images run them through the model, and output them with bounding boxes in detected_images.
Here's a collection for making it to the end of this post. Thank you for reading and I hope you enjoyed.
All satellite imagery is owned by Google Earth, specific attribution for each snippet could not be provided.
Many thanks to the OSINT community who made the initial research for this project possible; to the Open Source community for making ultralytics and YOLO such a reliable platform and Google Colab for the free-tier GPU resources, without which this project would not have been possible.